Net Control 2 has two types of connections:
Instructor-initiated connections – these connections are static, permanent, created and stored on Instructor’s computer in the Instructor’s workspace. The connections are initiated and opened by the Instructor’s computer. This is default type of connection, Net Control 2 creates such connections as result of network scanning, importing or creating connections manually.
User-initiated connections are dynamic connections, initiated by the client module, when, according to its settings, the module connects to one or several Instructor computers. When the connection is established, the Administrator Console creates an icon (thumbnail) for this connection in a workspace, and removes it from the workspace automatically once the connection is closed. User-initiated connections are always used in Net Control 2 Client, if it was installed in Terminal Services Support mode or WiFi/MultiVLAN mode. The Instructor cannot change parameters of user-initiated connections (including connection name, description and address).
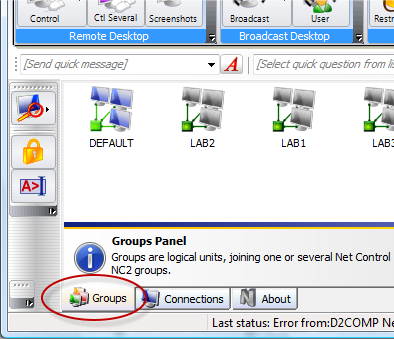
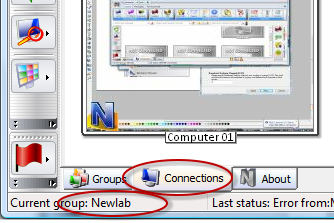
Client computer belongs to some group, by default, if none group was assigned in the process of installation, the computer belongs to the “Default” group. Net Control 2 groups are listed on Groups tab (at the bottom of the main window):
How to assign the Client to some group.
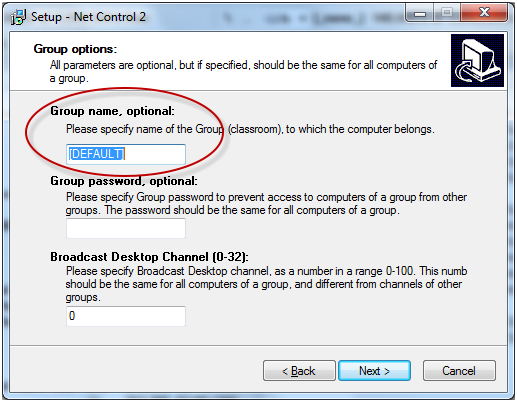
The client may be assigned to some group during installation, when the installer prompts for additional parameters:
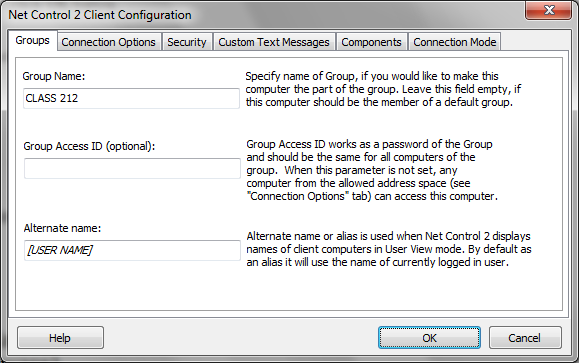
or, when the software is already installed, in the Client settings:
(to
change the Client configuration, select the client in the
Administrator Console and click the main menu command N
-> Options -> Remote Computer Options;
or on client computer click N
icon in the System Tray, then click the menu command “Configure”).
When the software is installed on client computers you can scan your network for groups and connections, clicking the main menu command N -> Connections -> Search Groups; or clicking the “Scan network for groups and connections” menu command of Scan button’s submenu:
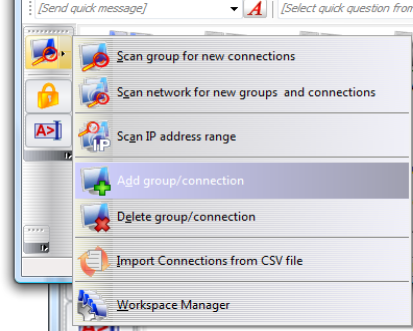
To delete a group from the workspace, click the Delete group/connection menu command of Scan button’s sub-menu. To add a group manually, use the Add group/connection menu command of Scan button’s sub-menu.
Connections list (on Connections tab, at the bottom of the Administrator console) contains connections of the current group:
To Scan the current group for new connections click Scan button on the left toolbar.
To delete connections of a group, select them in the workspace, then press Delete key on a keyboard or use the Delete group/connection menu command from Scan button’s sub-menu.
How to change a group, to which the client computer belongs.
To change a group of the client computer:
Select one or several client computers in the Connections list;
Click the main menu command N -> Options -> Remote Computer Options;
On Groups tab, specify new Group name;
Click OK.
Delete connections from old group.
Open new group and scan connections in this group or use N -> Connections -> Scan groups menu command to re-scan the network for new groups and connections.
Or use the Workspace Manager tool for moving connections from one group to other.
To add new connection manually, click the Add group/connection menu command from Scan button’s sub-menu or press Insert key on a keyboard.
To modify name, description, port or IP address/DNS name of the connection, select it in the connections list and click Modify group/connection from Scan button’s sub-menu.
In the Modify Connection window, specify connection parameters:
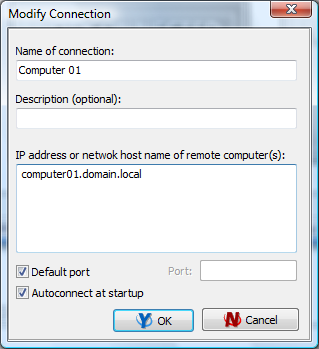
Name of connection – custom name of connection as it will be shown in the Connections list.
Description – optional description.
IP address or network host name of remote computer(s) – IP address or DNS name of the client computer. If several addresses specified, Net Control 2 will create a grouped connection.
Autoconnect at startup –when enabled (recommended), Net Control 2 will connect this client computer automatically upon opening a group in the workspace. When disabled, the connection will not be connected automatically, to open a connection with this client you need either double click the icon or use the main menu command N -> Connections -> Open Connection.
User-initiated connections cannot be modified.
Multi-VLAN environment. How to create a workspace if connections cannot be found.
In several cases Net Control 2 may be unable to find computers in the network. This may occur if:
The network consists in several VLANs. In this case scan requests will be “visible” only within bounds of the VLAN, to which the sender of the request belongs.
The network does not support UDP broadcast or Multicast protocols or scope of broadcast is limited.
Third-party software blocks UDP/Multicast traffic.
When automatic scanning is impossible, you can create a workspace by:
Scanning an IP address range of the network.
Importing connections from the Active Directory, the Network Neighborhood, or custom text file.
Manually adding connections one-by-one, using IP addess/DNS name as described above.
Advanced workspace import features are available in the Workspace Manager tool.
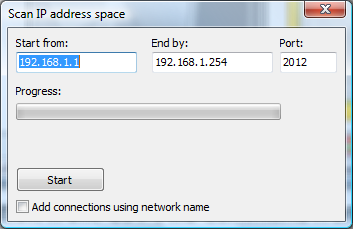
How to scan IP address range for new connections.
To scan an address space of the network for available Net Control 2 connections, click the “Scan IP address range” tool from the Scan button’s sub-menu, specify begin and end of the address space; enable the “Add connections using network name” option if your network uses DHCP/dynamic IP addresses and click Start to start scanning. The procedure may take significant time, up-to 30 seconds/IP address.
How to import connections from a text or CSV file.
To create connections and groups lists from a custom text file:
Click Import Connection from CSV File command from the sub-menu of the Search button.
In the Import Workspace window, describe the structure of information in imported file.
An example: imported file contains information in CSV (comma-separated values) format:
COMPUTER01,LAB1,192.168.0.2
COMPUTER02,LAB1,192.168.0.3
…
COMPUTERXX,LAB1,192.168.0.XX
I.e. values are delimited with comma sign, first value is computer name, second value is a workgroup, third value is IP address.
Open File, click the […] button.
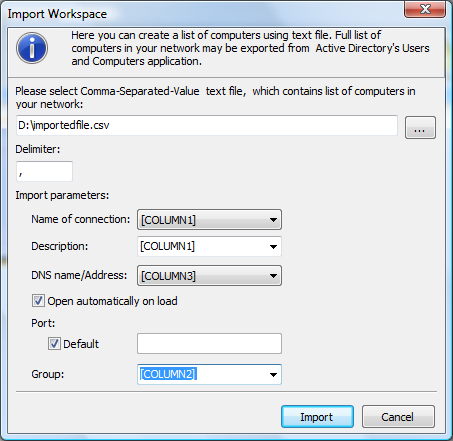
According to our file, name of connection is in first column, IP address is in third column, Group name is in 2nd group.
Click the Import button and restart the program.