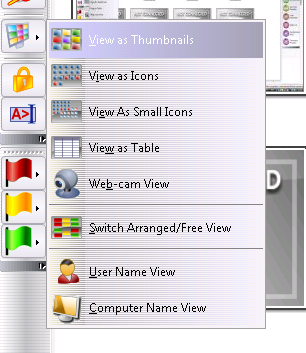
The Administrator Console supports different view modes. To change a view mode, click the “View” button’s submenu or use the main menu’s command N -> Options -> View Options.
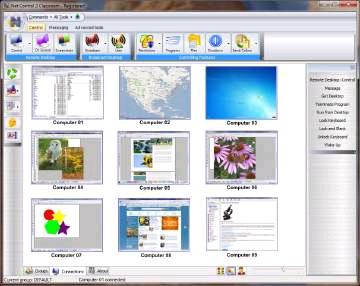
Thumbnail View: client computer displayed as a thumbnail with a screenshot of the client computer. To select this mode, use the “View as Thumbnails” menu command.

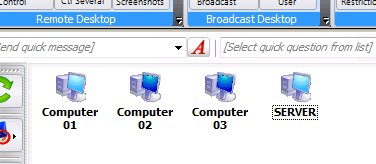
Icon View: client computers are displayed as large icons. To select this mode, use the View as Icons menu command:
Small Icon View. To select this mode, use the View as Small Icons menu command:
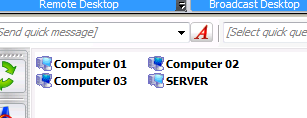
Table View. Provides additional information: IP address or host name of client computer and custom description assigned to the connection. To select this mode, use the View as Table menu command:

Web Cam View. Displays a snapshot from web-camera, installed on client computer. To select this mode, use the Web-cam View mode menu command.
Arranged view – icons or thumbnails are sorted and arranged to the upper-left corner of the connections list. This is default view mode. Sort method may be changed or selected in the main menu command N -> Options -> Options -> View Options -> Sort.
Free view – icons or thumbnails are not sorted or arranged, and may be freely moved within the connections list. Net Control 2 will remember layout of icons/thumbnails and will restore it at next startup.

Free
and arranged
view modes may be selected, switching the “Switch
Arranged/Free View”
menu command or clicking the Arranged/Free
View
button at the bottom of the Administrator Console window:

User Name View – when User Name View mode is active, as a name of connection Net Control 2 will display:
- full user name of the currently logged in user on client computer (if this name is set up in the Active Directory for this user account);
- login name of the currently logged in user on client computer (if the user is logged in);
- custom Alias if the alias name was set up in Client settings (on Groups tab);
- a name, entered by the student on client computer in Student Registration dialog, if the student was registered.
Computer Name View – the software will display default connection name as specified in its settings, by default host or DNS name.
To
enable Computer
or User
Name View,
click the Computer
Name View
or User
Name View
command of Views menu; or click the respective button at the bottom
of the Administrator Console window:
